I am writing about network automation. but there is definitely a need
to use end hosts. So given that this entire lab is virtualised it is
easy to spin up end nodes as test targets. So this lab will prepare the groundwork by creating the linux machine hosting the ansible applicaiton, and the site linux endpoints…please refer to last weeks blog for details of the lab environment
The Labs page Resource section has links to the resource files used throughout the various lab, or alternatively go directly to my-network-ansible_playbook GitHub repository.
Ansible admin node
I started out by running ansible on an ubuntu linux distro. However I suffered endlessly from stability issues so switched to using RHEL7. This I sourced from RedHat using the free RHEL Developers subscription
Follow the install guide and make sure to add the dependent repos.
I installed the following packages onto this node:ansible - as this is the machine that will run ansible! putty - ssh client TeamViewer - allow remote control of the machine at a later date
Ubuntu - site nodes (as I had already deployed these)
Standard ubuntu install running either 16.04LTS or 17.10, please make sure ssh is set up!
I made sure to start out with all the linux nodes connected to the VM Network port group in order to carry out updates and quickly test ssh works between the ansible admin node and each of the site nodes.
Once again! It is really important that ssh is working correctly as ansible will only communicate over ssh!!!
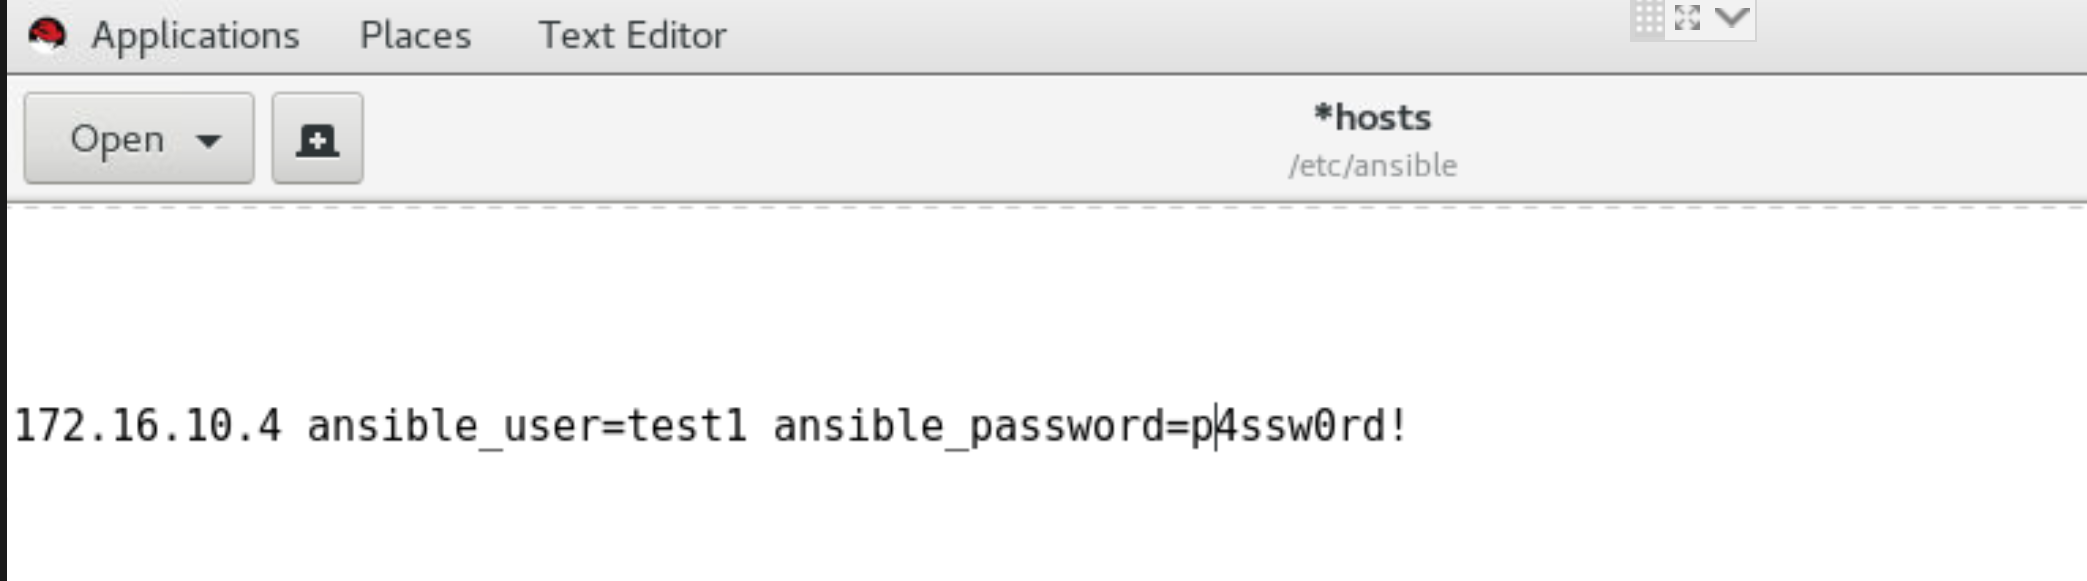
Now that these linux machines are set up and communicating on the VM Network Port Group, we can test that Ansible is working by doing some very basic tests. So it is time to create a first basic inventory file to allow basic testing between the RHEL7 ansible host machine and the ubuntu endpoints, as follows:
"ip address of host" ansible_user="username" ansible_password="password"Procedure to confirm ansible is working correctly
change italic values between "" to your own settings
Note: I will go into ansible in much more detial in future blog posts, so at this stage add an entry into the host file as follows(1 entry per server).
Example from my inventory (hosts.yml)
172.16.20.2 ansible_user=test2 ansible_ssh_pass=p4ssw0rd!
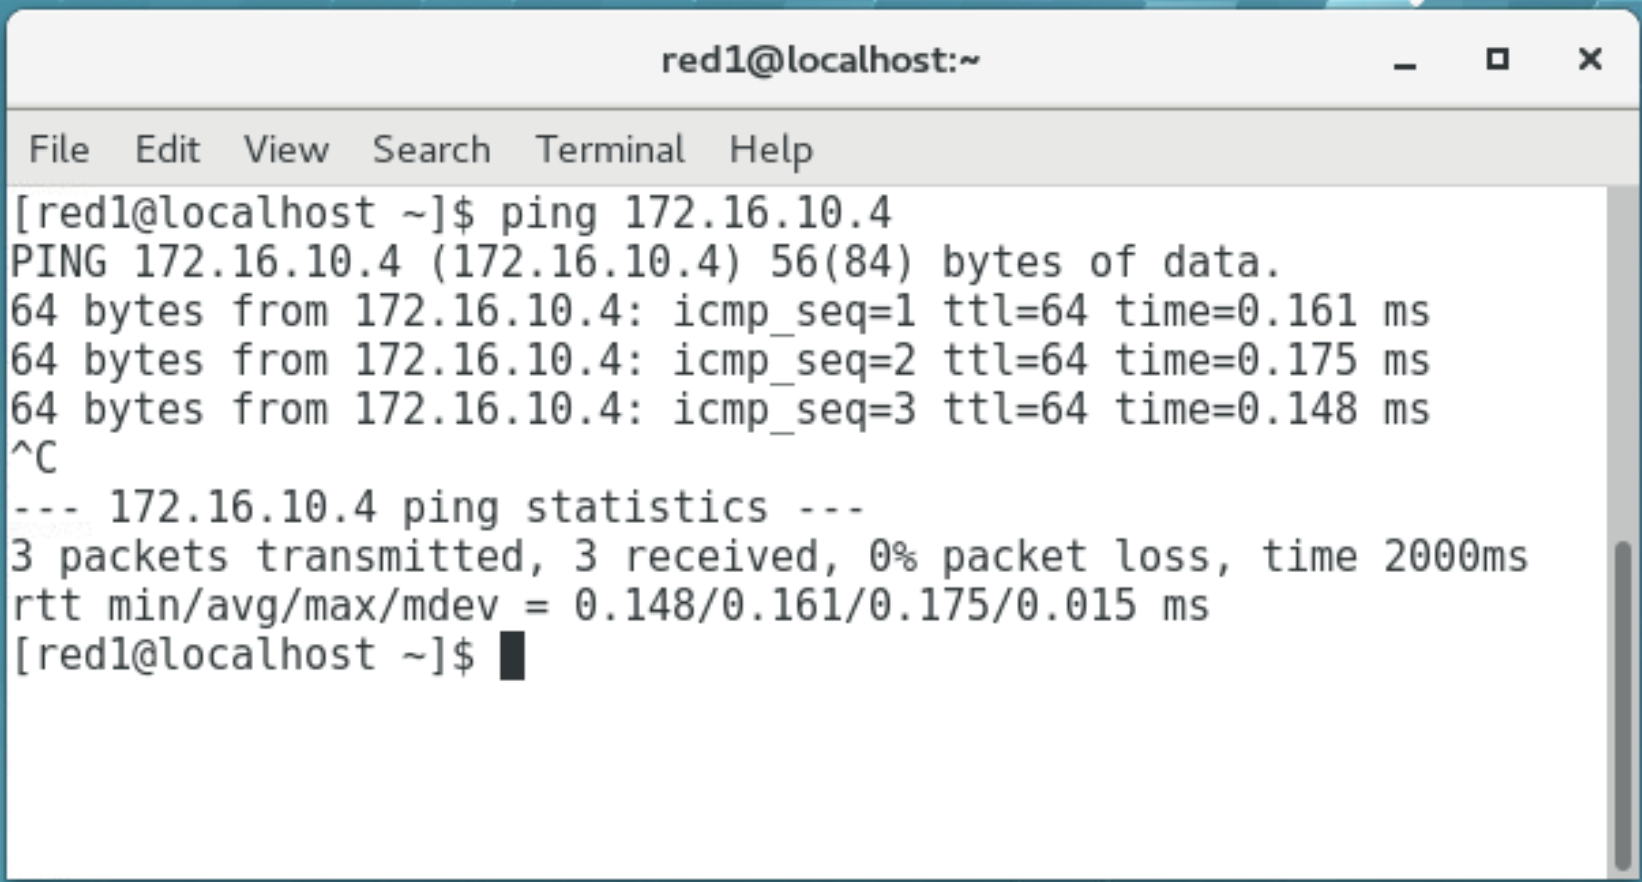
1. First ping to ip address to confirm connectivityBelow is an example of the 5 step "Procedure to confirm ansible is working correctly".
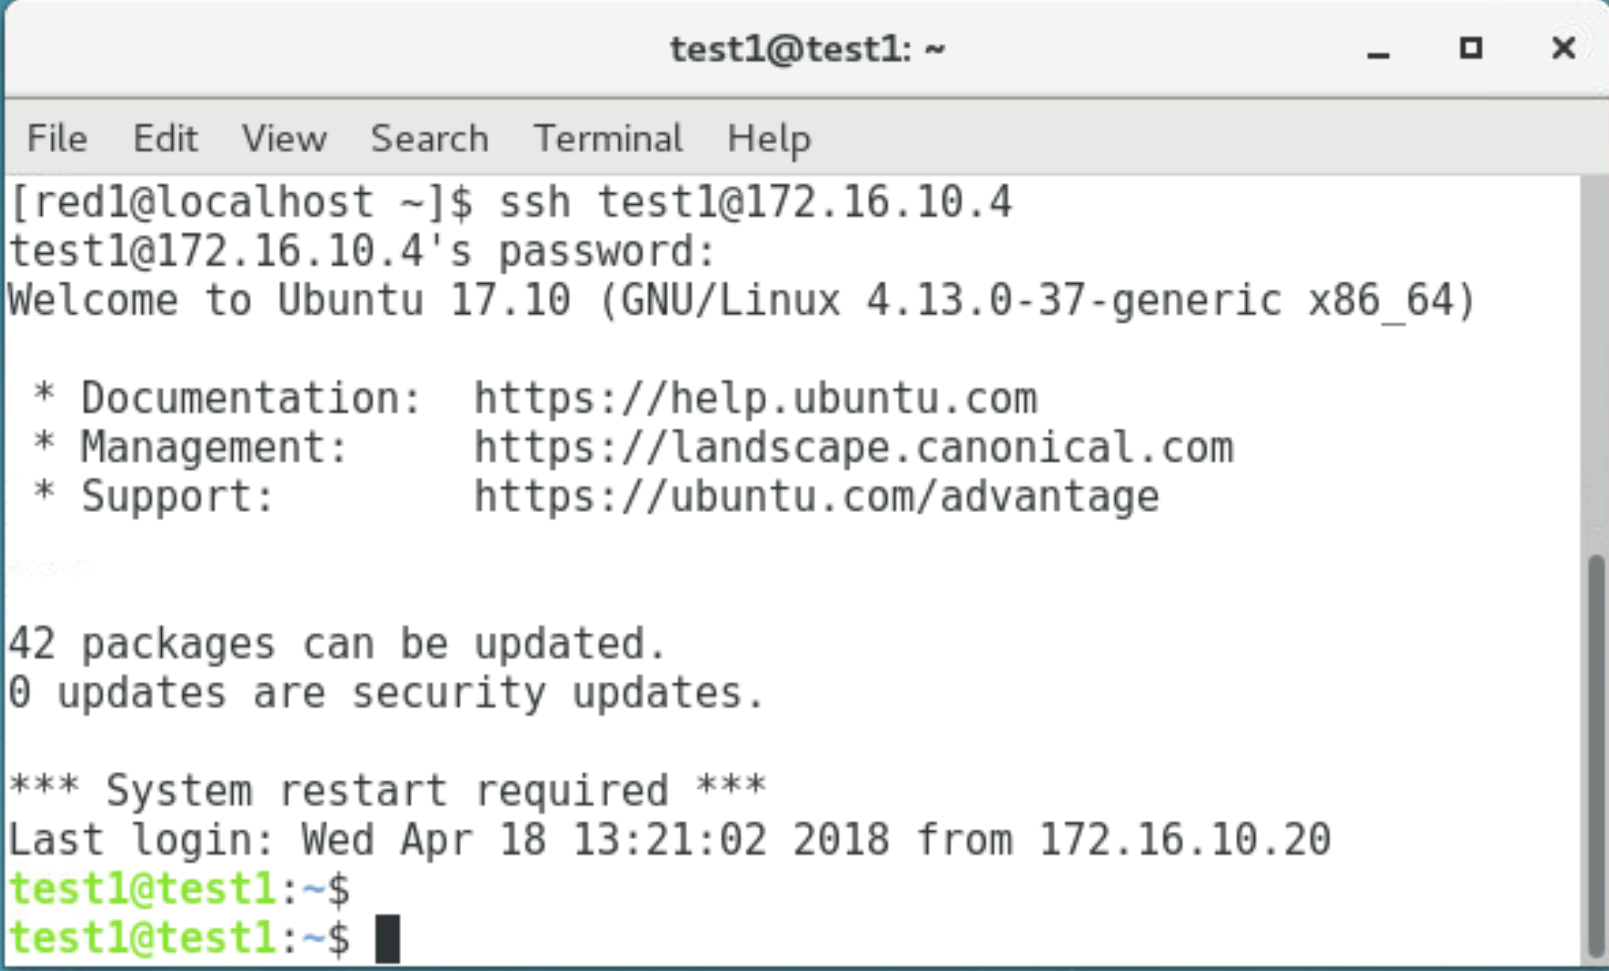
2. Then ssh to linux host with username from above
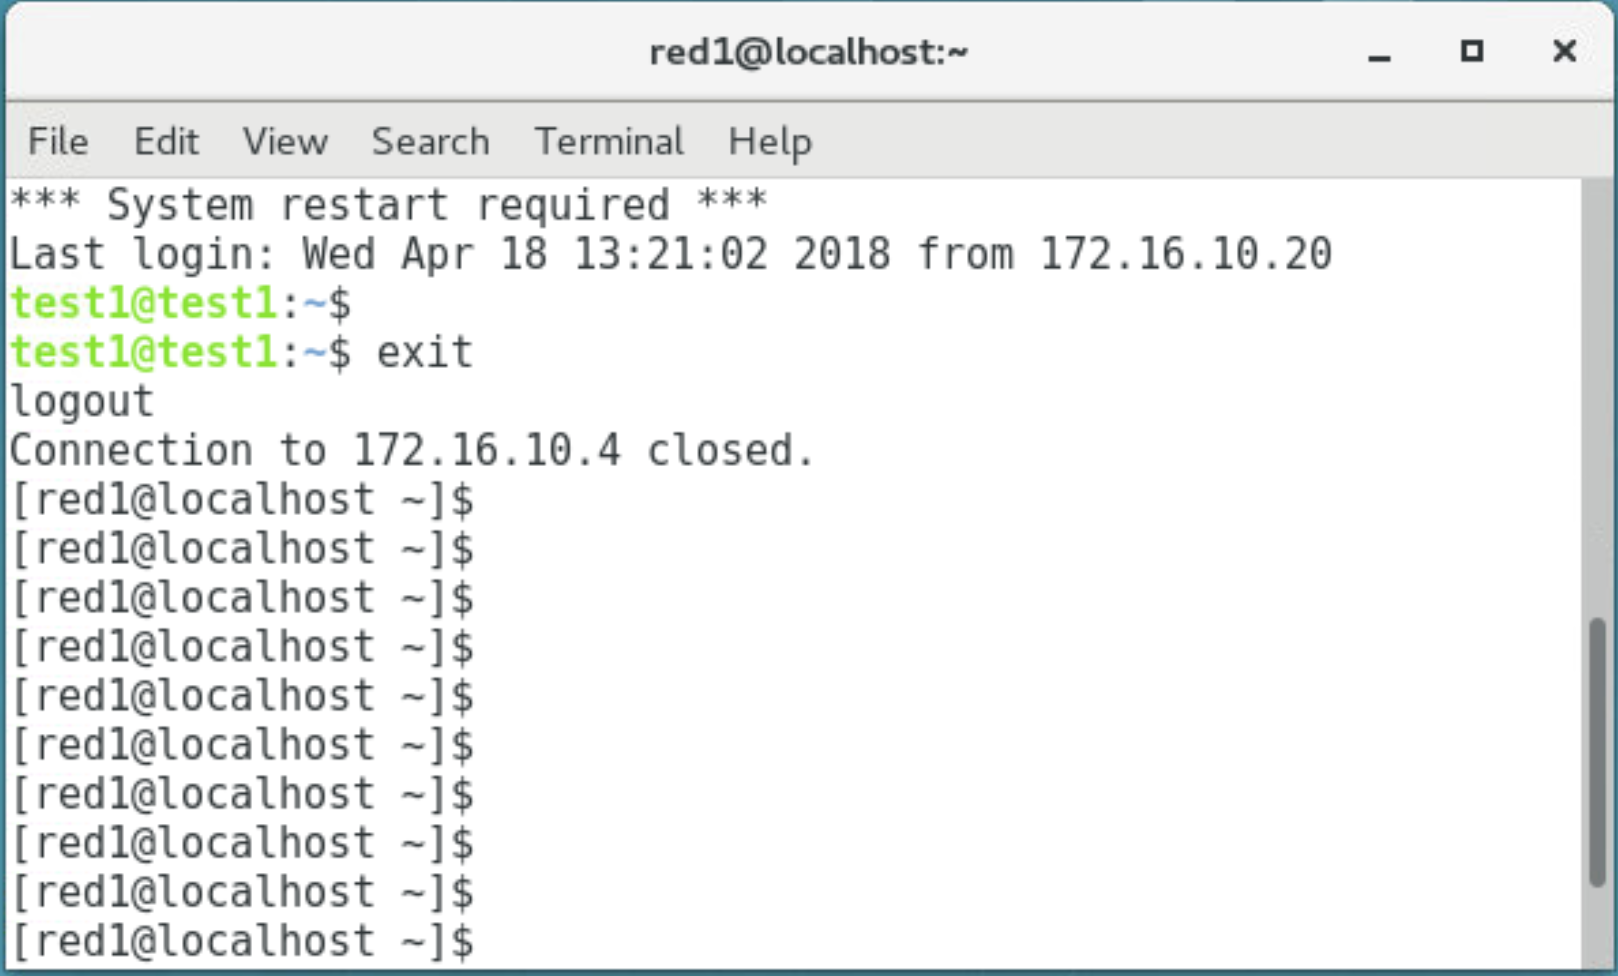
3. Return to Ansible host
4. cd to /etc/ansible
5. Then from the ansible host cli run the following: ansible all -m ping
1. Ping host
2. SSH to host
3. Return to Ansible host
4. Now change directory to /etc/ansible

5. Run ansible ping
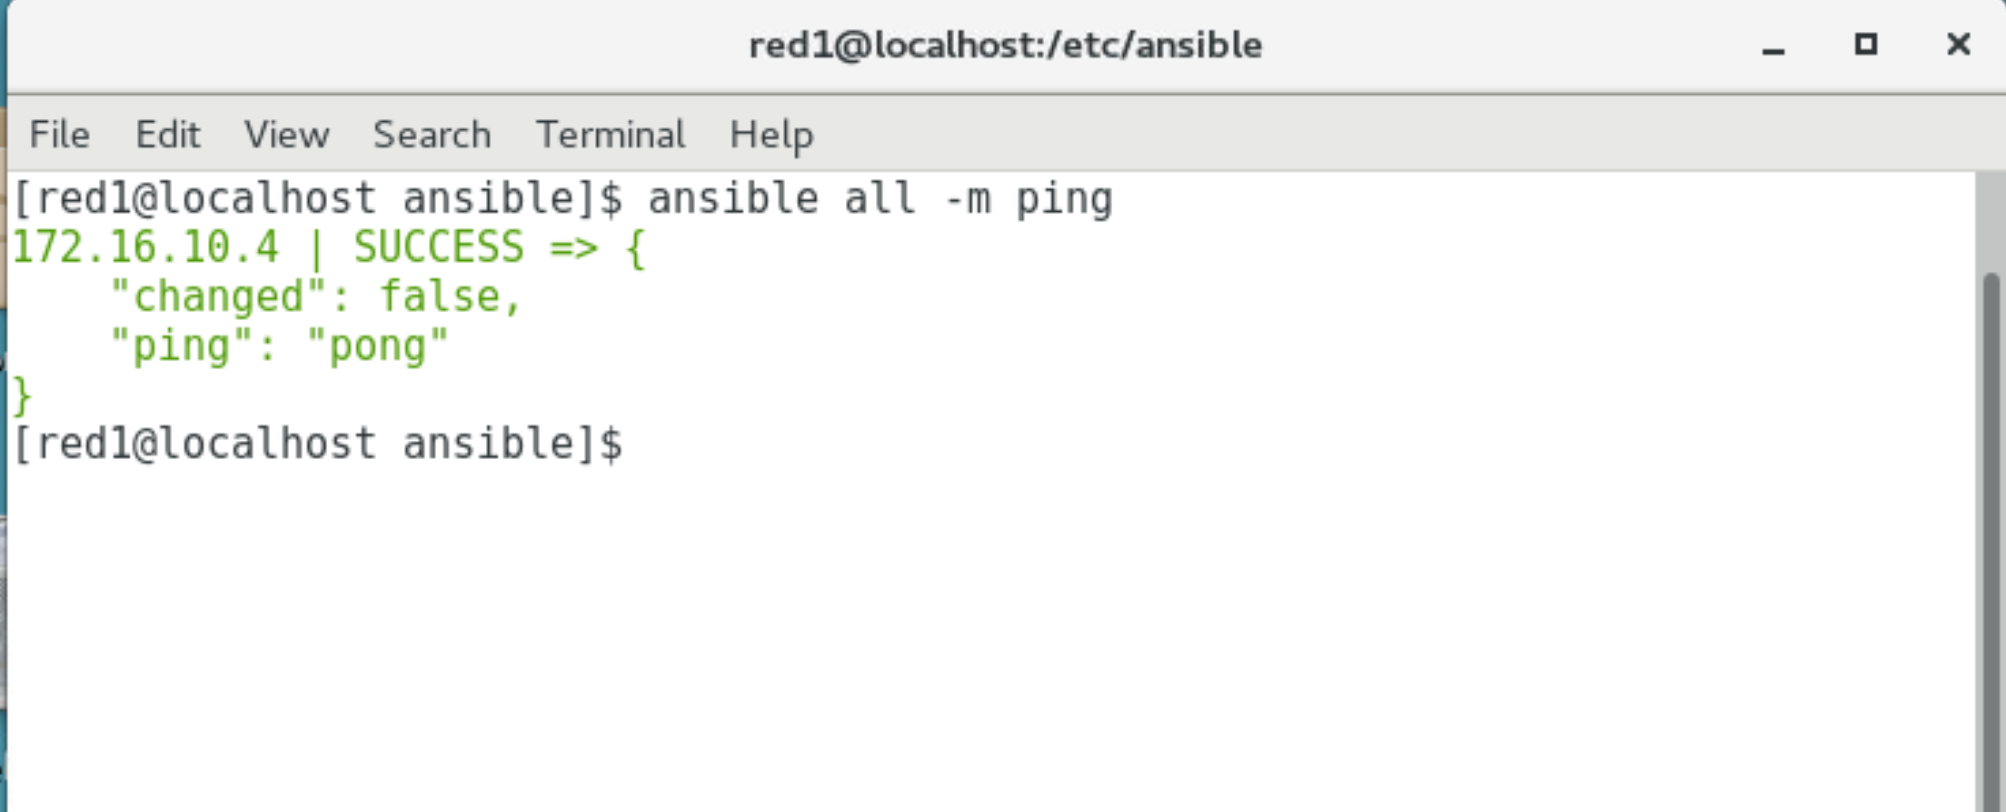
Success!!!